Meet Carl - a man with a plan.

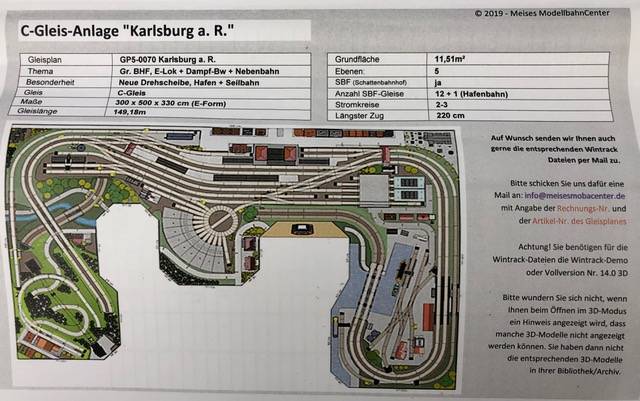
The layout is planned using Marklin’s C Track. I decided to go Marklin because I liked the detail of the models, the simplicity of 3 rail and that I can use tighter radius curves. The visible part of the layout is quite nice. When I started flipping through the plans and saw the benchwork design along with the lower hidden level I wonder if I bit off more than I can chew. Since the plans are all in metric the first thing I did was to invest in a meter stick and a metric tape measure.
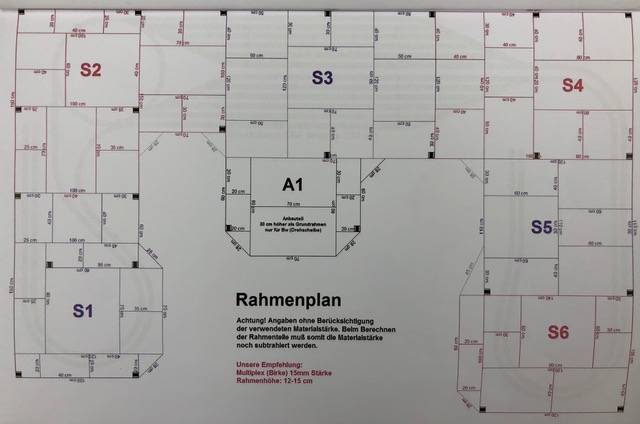
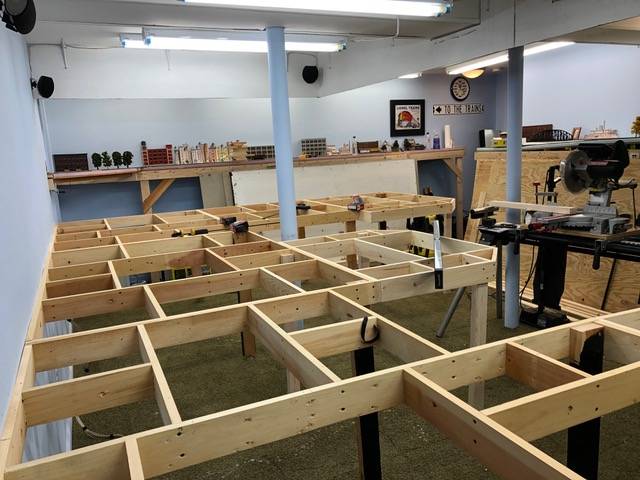
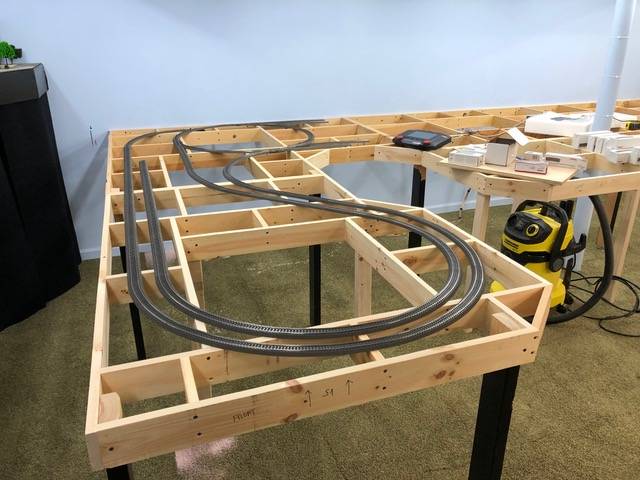
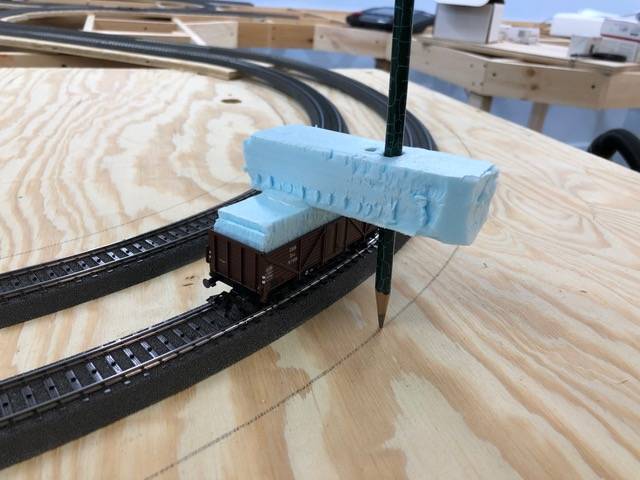
The benchwork went together very easily and what looks like a jigsaw puzzle will set me up for having attachment points for the upper levels. I laid out the track on the open framework to check for proper positioning. I then put plywood underneath the track and made a “compass” car to mark the plywood and cut it out to fit. Because I wanted to deaden the sound and have a smooth surface I glued 1/4” cork to the plywood. From here the track was laid and secured, the wiring is in and I’ve test run what I have so far. I will send you more updates as the work continues. Regards, Carl
Blog update July 5th 2022
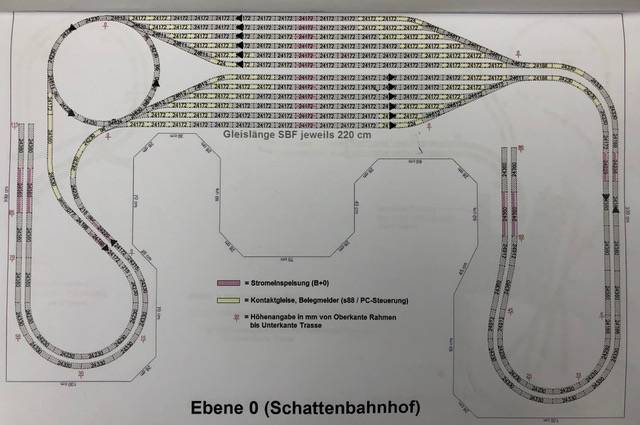
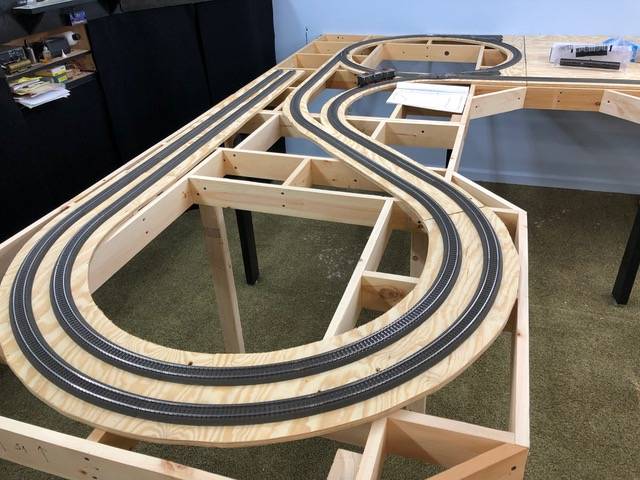
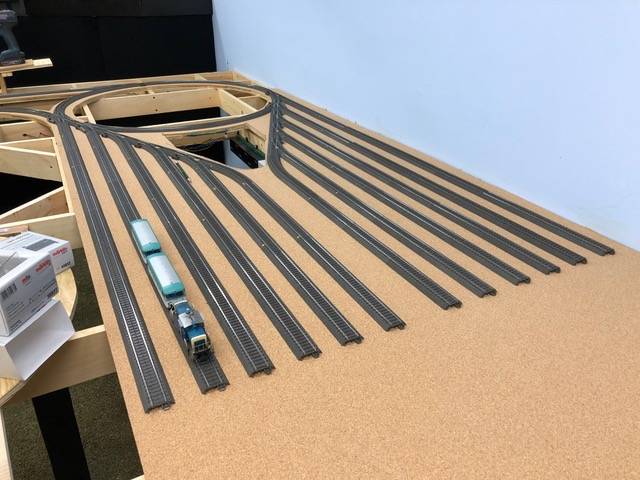
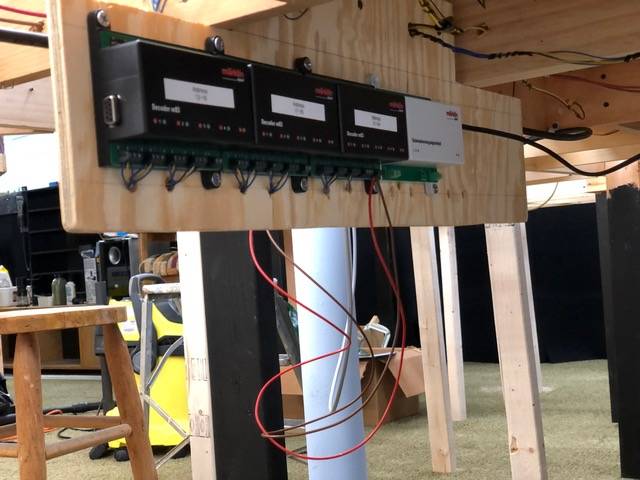
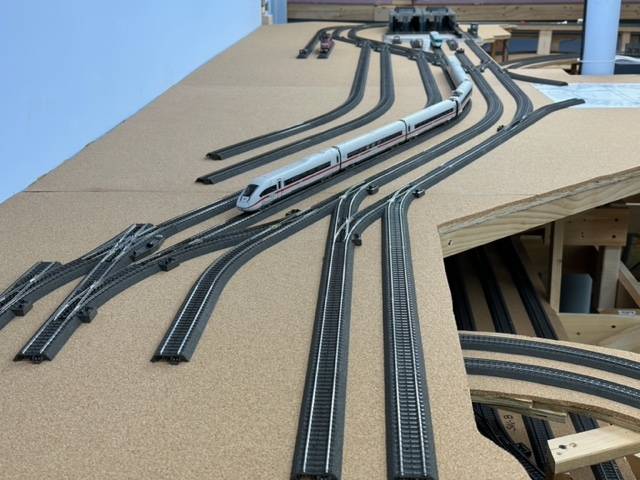
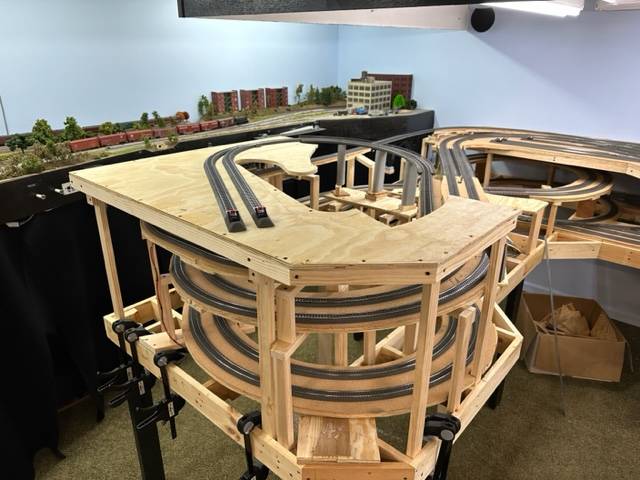
As promised, here is my next installment of my “ Man with a (Track)Plan blog. As you can see from the photos, I have completed the right half of the lower level or Schattenbahnhof as they say in German. Once the track was in place I was able to wire in all of the turnouts using the Marklin M83 turnout decoders along with the external power supplies. While the turnouts can be powered directly from the Marklin CS3, I decided to power the switch machines with their own power. Given the size of this layout, I did not want to power everything off of the CS3. I also added a separate power supply for the turnout lanterns as well. I will continue to use the external power supplies for all of the lower level accessible turnouts and accessories. When I get to the upper level I will be using the built in decoders and these will be powered by track power from the CS3. I am opting for this method because there will only be 11 to 12 inches of clearance between the lowest level and the underside of the upper level. Now it is time to start building higher. The last photo is of the next stage.


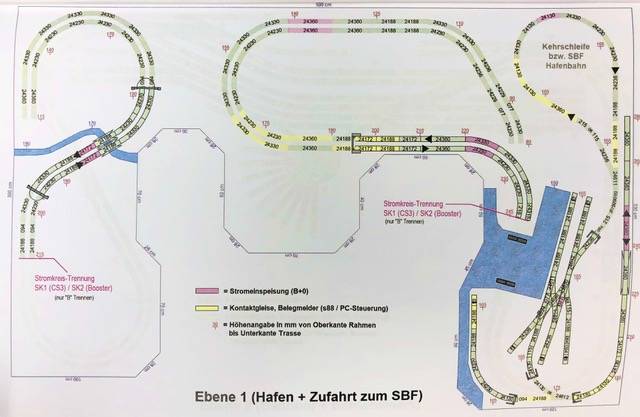
Track Plan for the next level up.
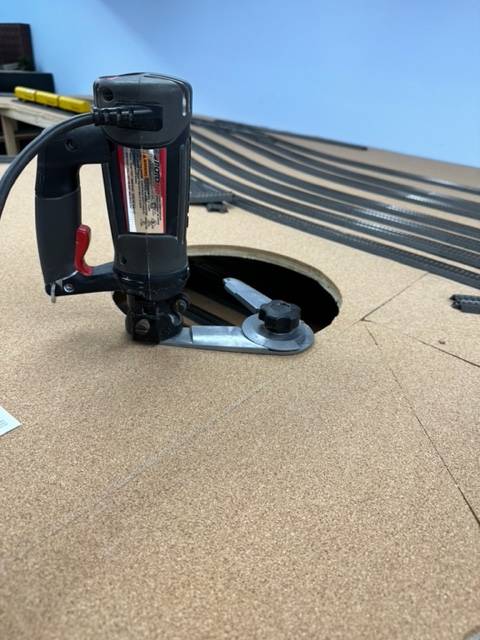
Home made contact tracks. All you have to do is cut the connection between the two rails, use insulated connecters at the beginning and end of the section and run a wire for a S88 Feedback Module.


Blog Update 10/18/22
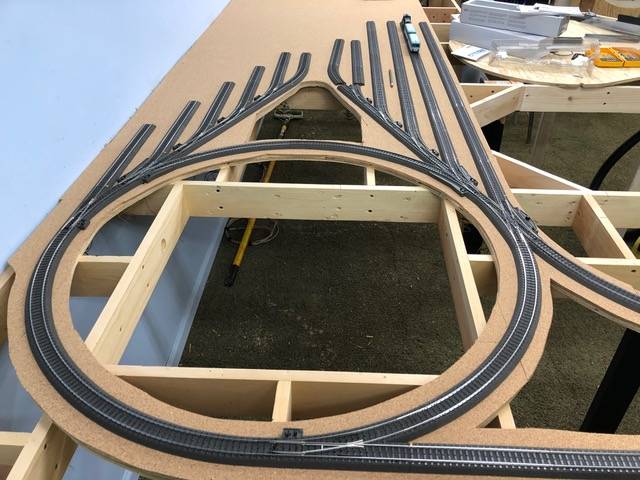
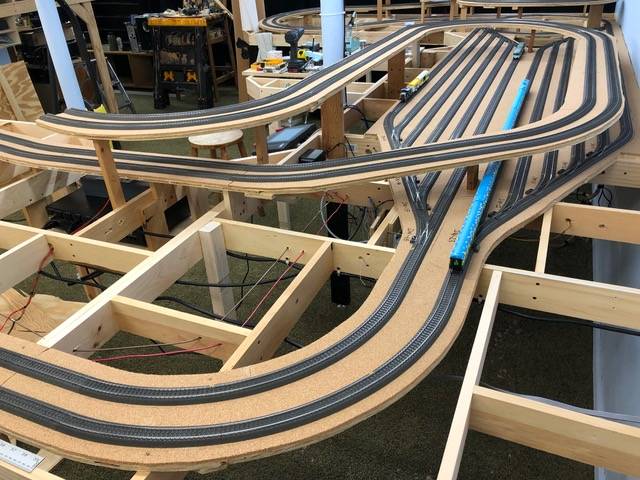
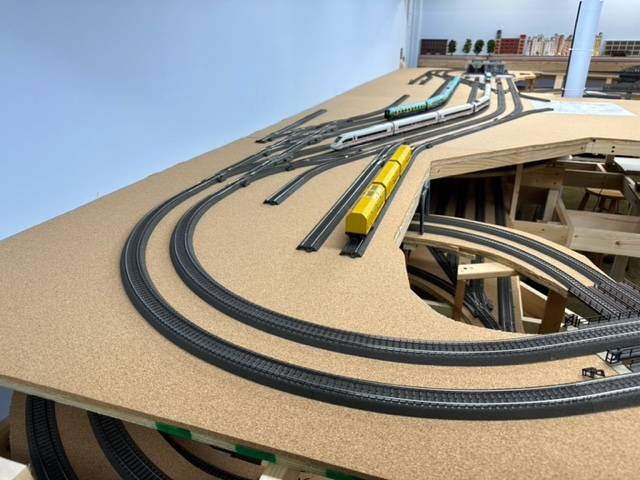
Hi Michael, It’s been a while since my last update, so here goes. I finally figured out how to put in the harbor area. The problem was that all of the track in this area is not connected to any of the existing track. The next section will connect the two tracks of the main line with the harbor trackage at the top right of the photo where the single track on the right is now headed. So far, so good. Now I have to wire this section and when it gets connected to the main I’ll be able to screw the track down. Next up will be the upper level. Till next time, Carl


Blog Update 1/15/2023
Here is my latest update to the layout. The harbor with its return loop is now complete. In this installment I am now building the track that will take me to the upper level. The hardest part here was deciding just where the harbor area should be placed. All of the track work there is not connected to any of the existing track. It only connects at the top level where the track from the harbor goes up to the top level. When using the plan I could only approximate where to start laying the track. It all worked out and I’ve got all of the turnouts in ou the right side of the layout. Next up will be connecting the left side and bringing it up to the top level.
Till next time,
Carl


2/23/2023 Update
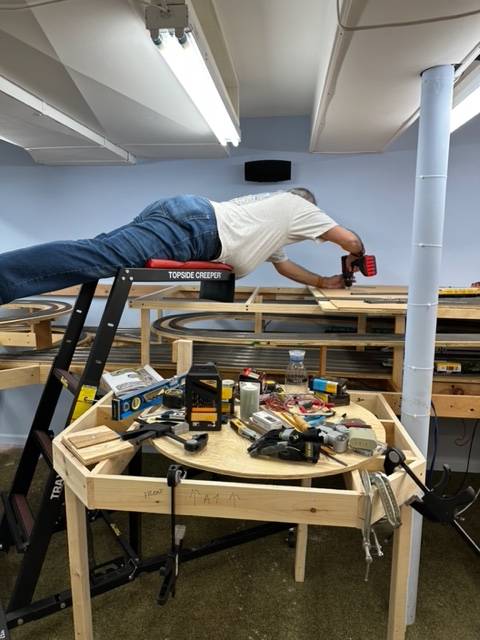
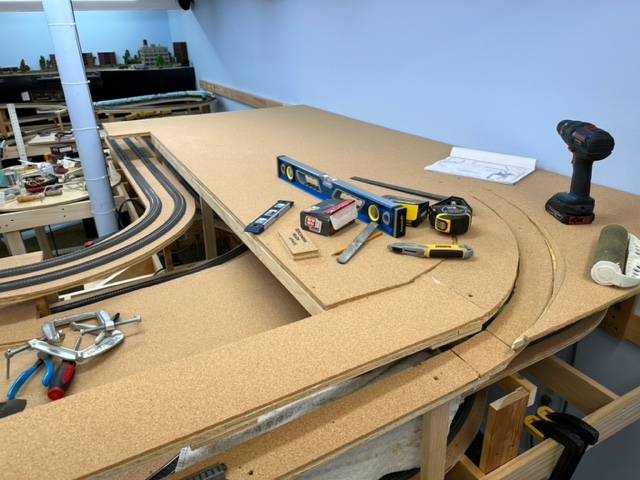
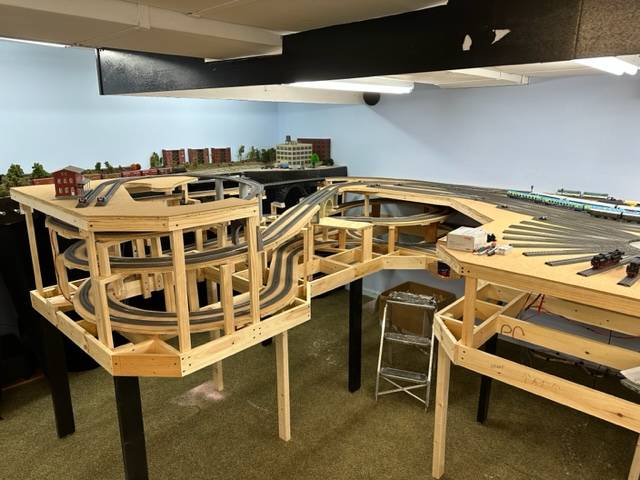
With a bit more free time and some very cold weekends I was able to make a big push with the upper level. As you can see, the transfer table is in place and I was able to test fit some track and do a teat run around the layout. It took about two minutes and twenty seconds to complete a full loop. Getting the framing for the upper level was quite the challenge but thanks to my Topside Creeper and long arms I was able to get everything attached. I ran out of the 24230 R2 curves and I am one piece short. Once I get that I will be able to finalize track placement on the upper level and start work on installing the turntable. While I was able to connect the track on the upper level I had to pull the left side slightly to the right to make the connection. That may nesscesitate me trimming the ramp and shifting the angle of the two concrete bridges slightly. All in all this is not a big problem and should be easy to correct.
Until next time,
Carl


Update 6/1/2023
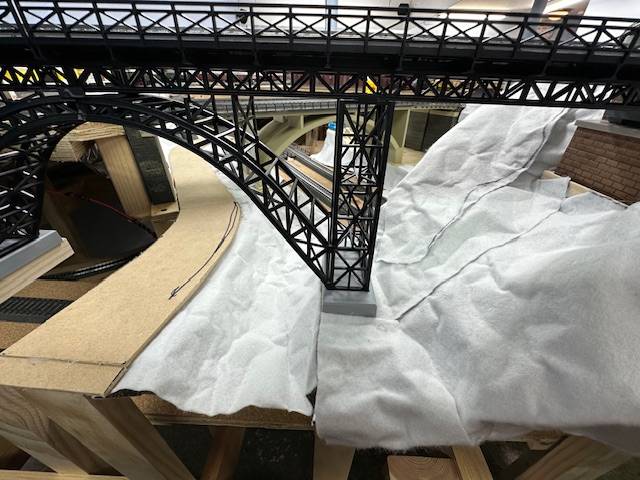
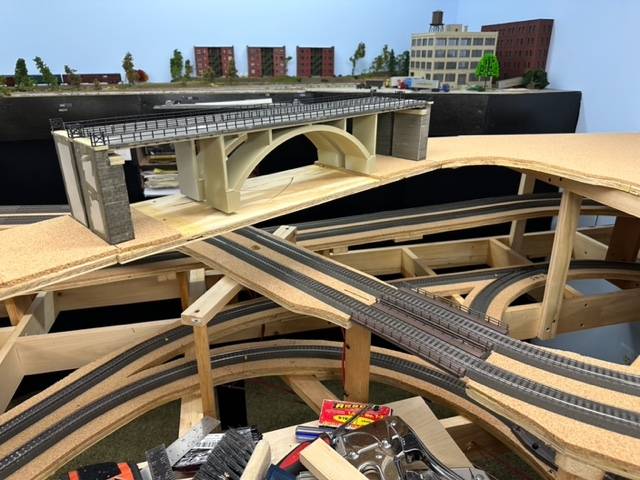
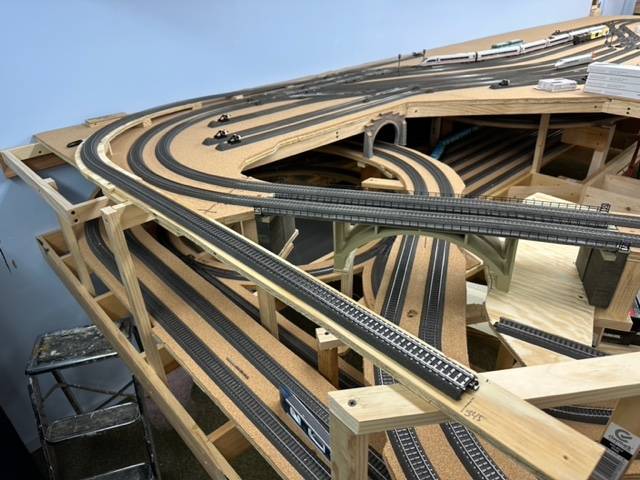
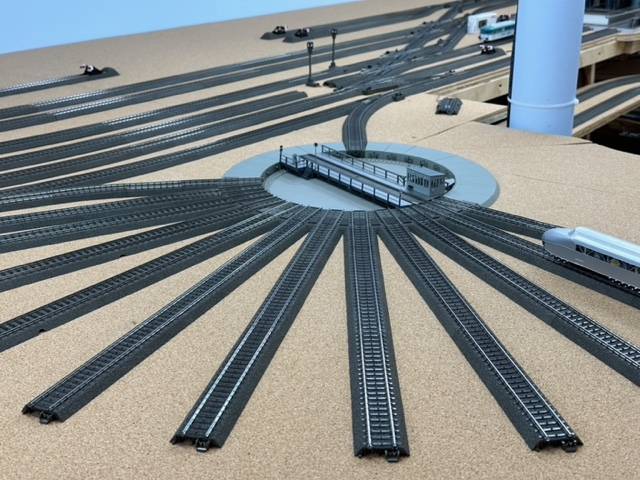
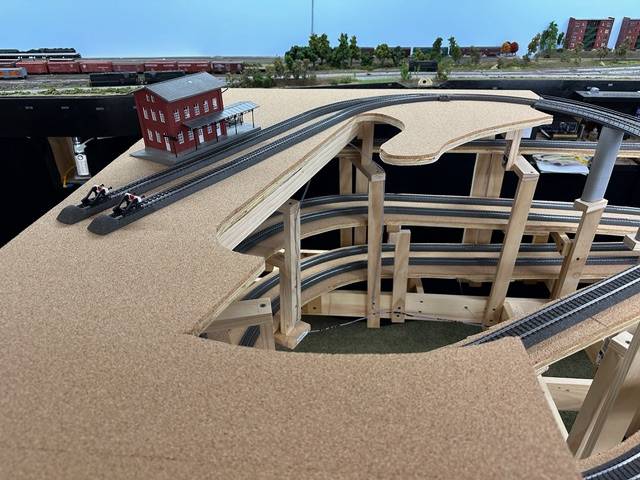
After a brief pause I got going on the last of the main line. As you can see by the photos, the bridge did not quite line up when I put it in place. All things considered, it wasn’t too big of an error. The plans that I am working from are not super detailed and since this is the third level that I was working with I felt pretty good about the minor fix that was needed. Once I had the main line connected I was able to move on to installing the turntable. To make the circular cutout I used the Roto-Zip with the circle cutter attachment. After the hole was cut the assembly was very straightforward. The wiring was a little more involved because you need to wire each of the tracks to the main track power buss. With that in place I moved on to the mountain top branch line. At first I cut out a plywood ramp to mount on top of the upper level, but I didn’t like the way the track transitioned. I used th Roto-Zip again, adjusting the depth of the cut to go just below the bottom of the plywood. By doing that I didn’t cut through any of the framework. The last shot shows the area that the last bridge will be placed. Once it is set I can cut out the plywood and insert the bridge.


Blog Update 8/22/2023
All track is in.
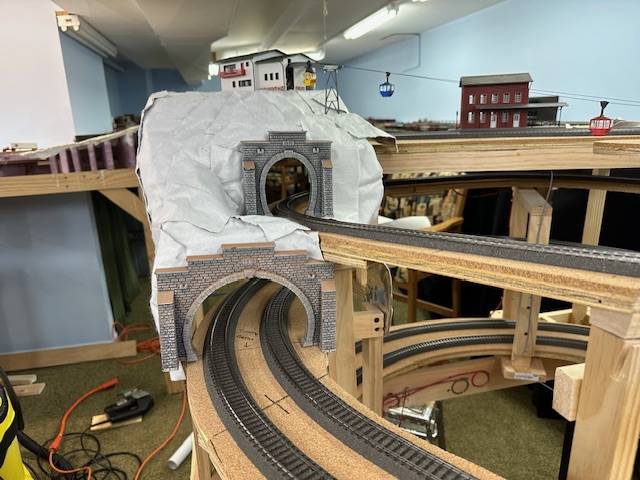
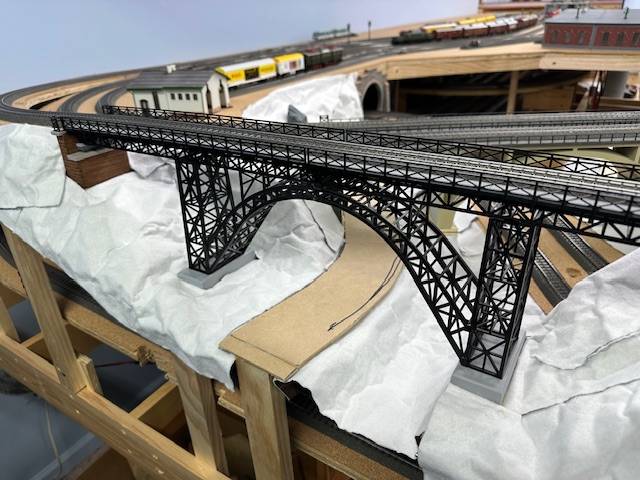
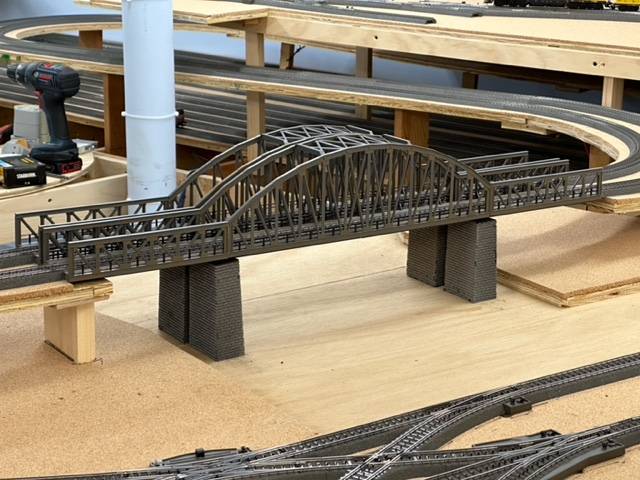
The last section of track is a single line that goes up to a small mountain top station. I started out by getting the plywood in place and leveled over the gorge where the last bridge will be going. Once the plywood was in I could determine where the bridge will go, cut out the plywood and insert the bridge. I supported the large bridge and the piers for the curved bridge on individual wood supports. This will allow more flexibility when installing a cable car and when configuring the scenery. For now I have a bit more wiring to complete and the it will be time to run some trains before starting on some scenery. When that starts I’ll have more updates.


Blog Update 1/5/2024
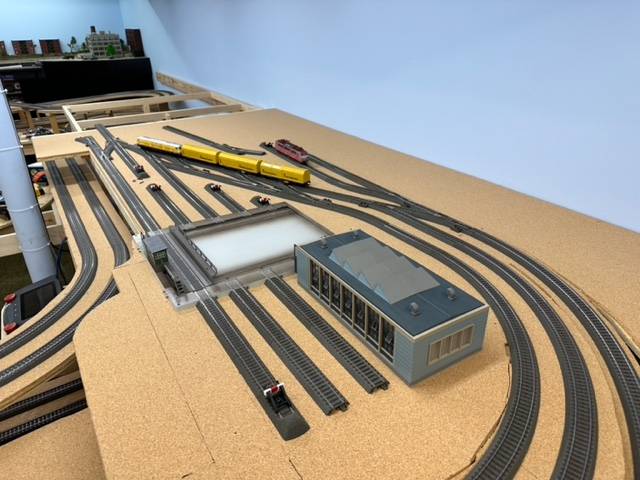
My trackwork has been completed and I wanted to show you where I am. I have a picture of the completed mountain station and the roundhouse. I left the rear sections of the roof unglued so I could get access if needed. I put some plastic strips, the brown pieces, on the back edge of the roof to keep it from sliding off. an easy fix and it works great. Since the layout is now powered by the CS3, I wanted to find a usse for the Mobile Station connector box that came with my starter set. I decided to make a short test track that I can use on my work bench away from the layout. It works well. Next up will be some scenery. Until next time. Carl


Blog Update 3/26/2024
It’s been a while since I’ve posted an update, so here goes. I am finally getting started on the scenery. It’s never been my favorite thing to do so I procrastinated a bit. My wife has been looking forward to helping me with it and so far so good. I’m using Woodland Scenics Shaper Sheets for the base. It’s a stiff foil with a felt like top surface to better hold the plaster. It’s very easy to work with and it attaches well to the framework with hot glue. By using a slightly longer length the you might normally need you can easily put in peaks and valleys with ease. The base for the road is 1/8“ Masonite that will be covered later. The first section is ready for plaster so there will be more in the next installment. Before I go I was able to find the mountain station that was pictured in the plan.
Until next time,
Carl